GetHealthy.js
GetHealthy.js is a pre-built client side library which leverages our public and private APIs to to alleviate the produce of wring custom frontent logic for the recommendation process.
The only things required to get started are
- An API Key generated by our integration team
- An instance code and store code - same as are used / require for our REST API sercices.
Embedding the app
After receiving your integration API key follow these simple steps to use the recommendation tool inside your application
Adding the script
In the head section of your html document add the following script component:
<script type="module" src="https://embed.gethealthy.store/react_app/js/gethealthy.js"></script>Preparing a container
At the appropriate place within your markup in the body section of the page, create an empty div container to use a target area for the recommendation client, - e.g.
<div id="recommendation-client"></div>Note: The ui client will consume the entire space, attempting to responsively adjust for smaller areas although it has not been optimized to support small screen devices and is not yet intended for use on mobile phones.
The minimum recommended device-width is 1200px.
Initializing the client
To initialize the client component you will need to obtain 3 parameters from GetHealthy:
- Access Token
- Instance Identifer
- Store Code
The rest will be handled transparently by the application.
Example Create and initialzie a new client instance using your token, instance and store identifiers:
<script>
    document.addEventListener("DOMContentLoaded", () => {
        // Create a new instance and initialize
        const ins = new GhEmbeddable({
                token: "{{YOUR_ACCESS_TOKEN}}",
                instance: "{{YOUR_INSTANCE_IDENTIFIER}}",
                store: "{{YOUR_STORE_CODE}}",
            });
        // Prepare specific feature. Currently only
        // recommendation-buidler is supported
        ins.create('recommendation-builder');
        // Display the UI
        ins.mount('recommendation-client');
    });
</script>
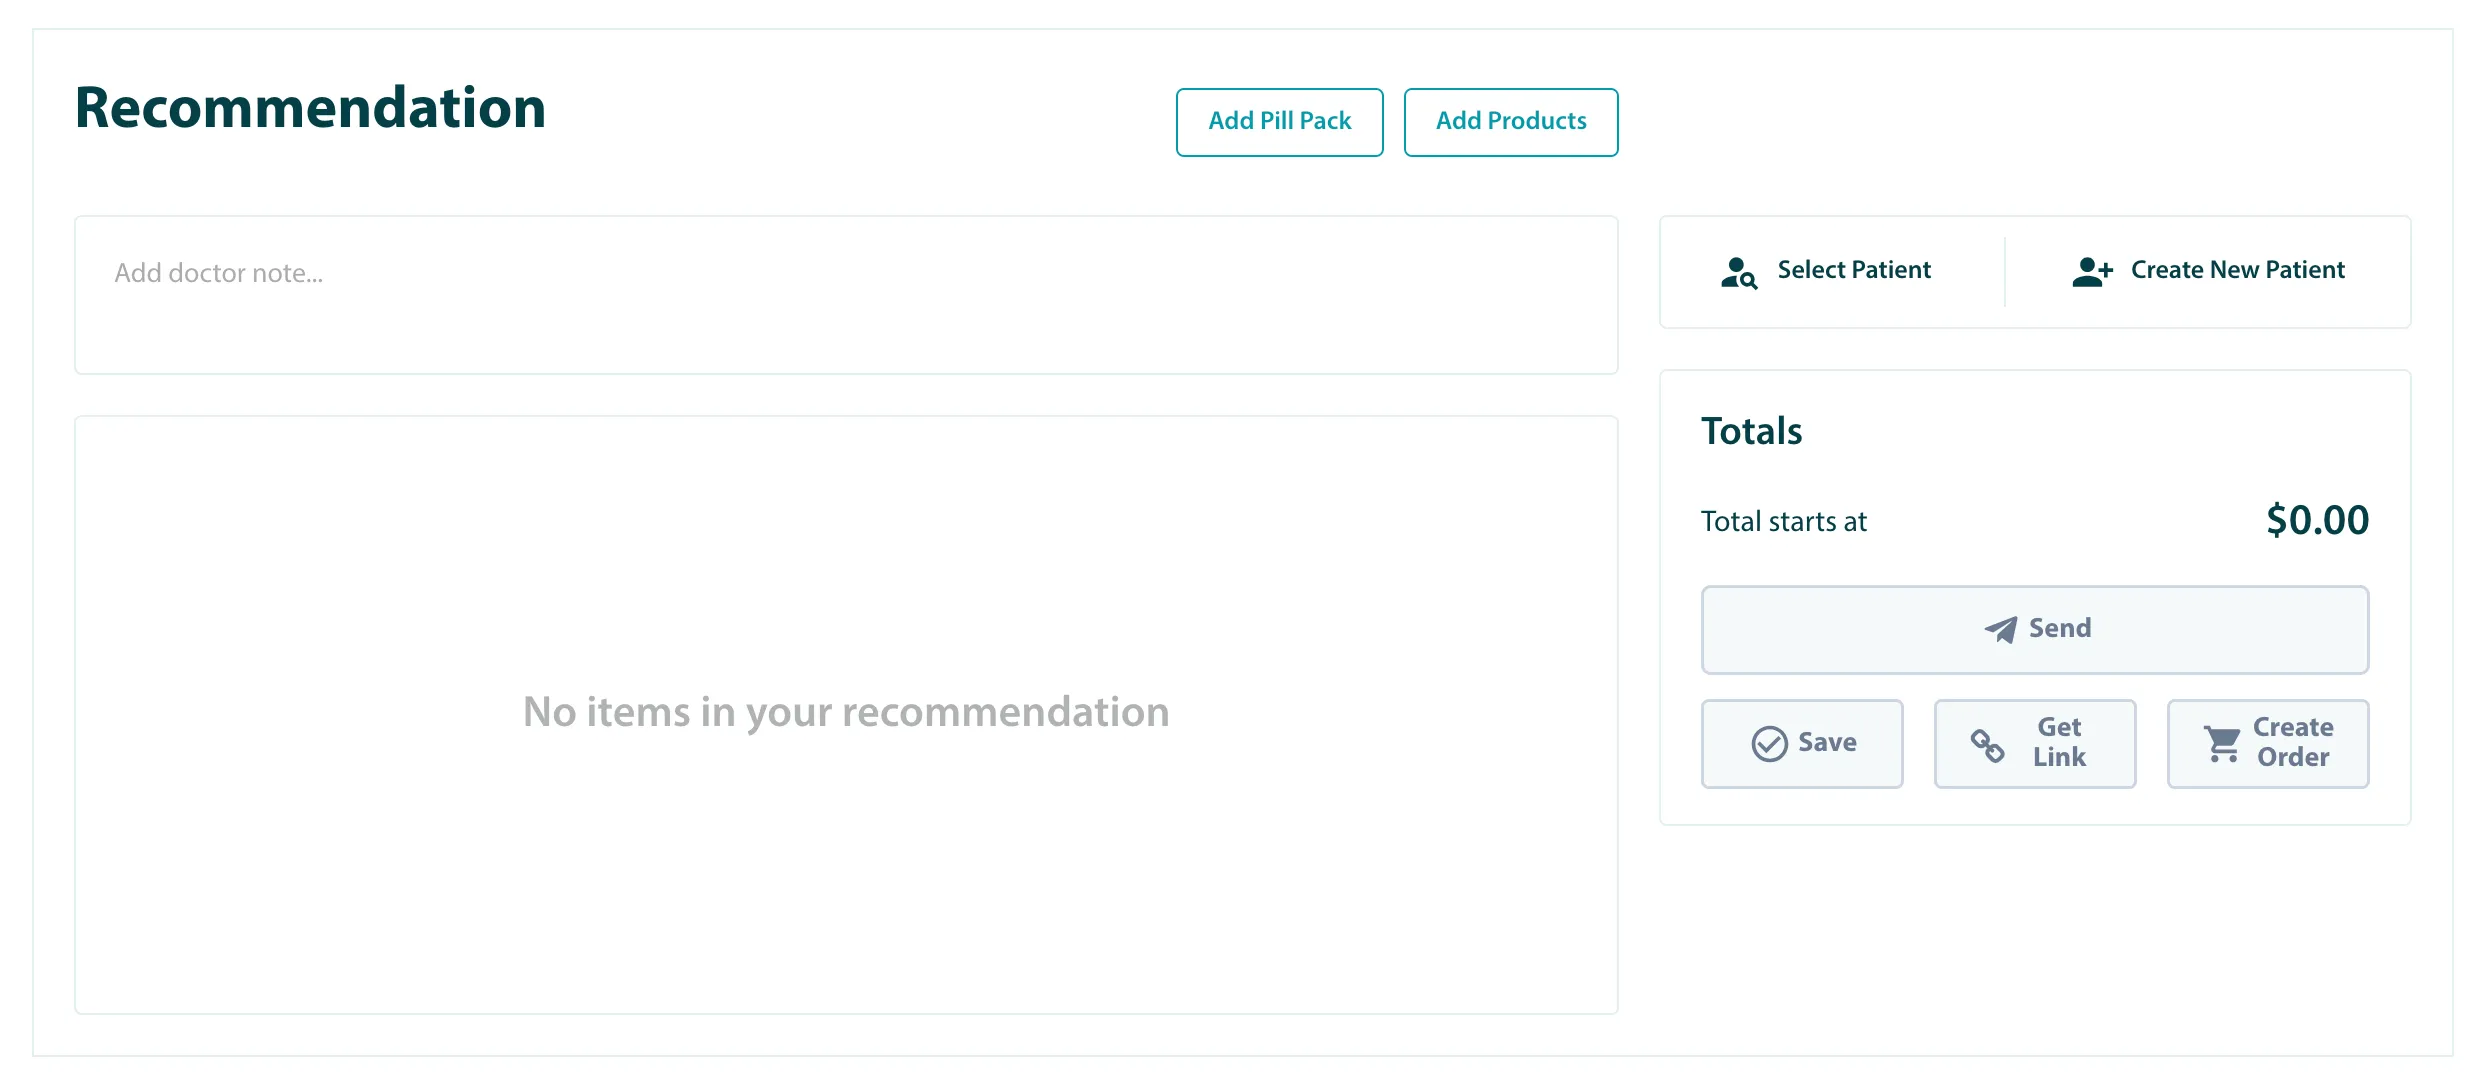
After completing the above steps the builder should be displaying on your page:
Additional Init Parameters
In addition to the required parameters token, instance and store you can initialize the instance with an existing recommendation for editing purposes, e.g.
const ins = new GhEmbeddable({
    token: "{{YOUR_ACCESS_TOKEN}}",
    instance: "{{YOUR_INSTANCE_IDENTIFIER}}",
    store: "{{YOUR_STORE_CODE}}",
    recommendationId: "{{SAVED_RECOMMENDATION_ID}}",
    disablePatientCreate: true,
    disablePatientSelect: true,
    patientData: ...,
    ...
});
Optional Parameters
recommedationId - When you have save a reference to a recommendation in your system, you can pass the recommendationId
patientData - You can initialize a patient record for recommendation with data from your system to have a patient record created along with the recommendation. The minimal structure from patient data consists of firstname, lastname and email .
Optional patient data fields include:
- gender - One of m,f,male,female
- dob - Birthdate formatted as YYYY-MM-DD
- persistent_discount - One of 0,5,10,15,20
patientData: {
    firstname: "John",
    lastname: "Doe",
    email: "[email protected]",
    ...
}
disablePatientSelect - true/false . Defaults to false. If true, this will prevent the user from switching the patient to a different one in the UX.
disablePatientCreate - true/false . Defaults to false. If true, this will prevent the user from creating a new patient record via the UX.
theme - Object. This is a JSON object to support certain paramaters for the adaption of our app into your theme enviroment. Currently the only supported parameter is zIndex
- zIndex - This allows adjustment of the sheet dialogs layering. The sheets always take the full screen height and elements of your page may interfere with the layering. Usually you'd increase the value to something higher. Pass a value that would correspond to the layering of your page stylesheet.
Patient Initialization: When initializing a patient and subsequently saving the recommendation, the email address is the primary unique key. If the email already exists, the recommendation will be associated with the patient record using this email address, else a new patient record will be created prior to saving the recommendation.
Events
To integrate the recommendation tool with your application, the tool provides continuous event output for a variety of user interactions
You can add listeners for these events like this
const callback = (value) => {
  console.log("callback value: ", value);
};

ins.on("{{EVENT_KEY}}", callback);
Each available event will provide a contextual event object. Returning true from any of the event handlers means that your application handled the event, i.e. if you want to send notifications using your own system - and the client will not proceed with its default behavior.
Emitted Events
recommendation.save - When the user clicks the Save button. The event detail will contain entire recommendation object, to be saved/referenced in your application.
recommendation.getLink - When the use clicks the Get Link button. The event detail will contain entire recommendation object, to be saved/referenced in your application.
recommendation.send - When the use clicks the Send button. The event detail will contain entire recommendation object, to be saved/referenced in your application.
recommendation.add - When an item is added to the recommendation object. The event detail will contain information about the sku that was added.
recommendation.delete - When an item is deleted from the recommendation object. The event detail will contain information about the sku that was deleted.
patient.select - When the user selected Patient for the recommendation. The event detail will contain relevant information about the patient, along with relation to doctors and locations.
patient.create - When the user creates a new Patient for this recommendation. The event detail will contain relevant information about the patient, along with relation to doctors and locations